Unit 10 : Scorpion locomotion
- Briony Davies
- Mar 29, 2025
- 7 min read
Updated: May 8, 2025
In this unit, we are exploring the locomotion of a scorpion. With my knowledge that came from the previous animation of a spider or 8-legged creature, and considering a spider and scorpion are in the same class (arachnids), I was expecting this animation to be similar. I thought this would be interesting from already exploring this type of locomotion, but there are differences, which introduce a new skill to refine my work to effectively capture the nuances of a specific species. Scorpions move by using their eight legs and typically move in a coordinated manner by essentially using two groups of legs to walk in (Bowerman, 1975), with pairs of legs on opposite sides of their body moving together. They also have a distinctive stinger and pincers, which are key elements in animating to define their unique movement. When first looking at the tutorials and reference video, it can seem overwhelming to animate this creature as they move with many legs, quickly, and also their body presents itself quite stiff and alert. I thought this might be tricky to animate as I want my work to feel natural and realistic, but it also needs to be fluid. After watching the tutorials and making note of the various body parts in motion, like the up and down of the body and the overlapping of the tail and pincers, I needed to consider if I should follow the tutorial exactly, to get a sense of the theory and principles, or if I should incorporate some of the movement I discovered watching "A scorpion walks" (Nature Magnified, 2021), where the scorpion moves in a more hostile and static way.


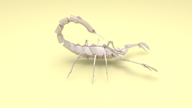


Key poses from my own animation
There was also another consideration. The rig has only three pairs of legs, not four, and is styled as a "mechanical" character and nothing organic about it. You could see visible joints and screws were modelled on this rig, which added a uniqueness about it. I wanted to animate it in keeping with its style and structure, but also wanted to showcase the locomotion as that in the tutorials. The rig itself is very well-made and thorough with the types of controls it has and easy to navigate.
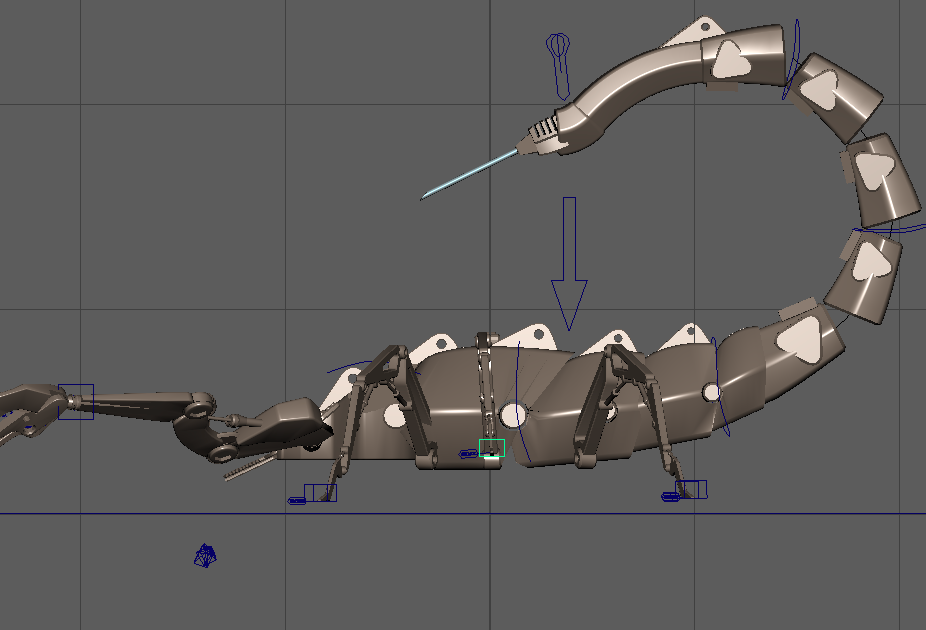
I first approached this animation by opening the rig, and I used an older version of the rig provided as the latest one had some issues such as the controls not moving with the mesh. I noticed the rig controls have not been created with exact zero translations on the Y axis, so I made adjustments accordingly before beginning the first frame.

A method I found exciting and intriguing was creating a shelf with the controls that I used most. I had never used or considered this method in organising my work before and found it very helpful in isolating the controls I used most. Additionally, it was helpful as the controls on this rig were small and hidden by the mesh, such as the tail as it curves. Therefore, being able to quickly locate the control I needed was ideal. It can also be useful in knowing that these are the only controls I used on this rig, and the others are not needed but are still visible.
The process for the animation was straightforward, as I took the front leg and set the keys on a 17-frame rate (16-frame cycle). The leg makes contact, goes back, then up and forward to finally return to the first frame pose. I then copied and pasted these keyframes onto the opposite leg and offset it by 8 with infinity curves pre and post turned on. There were some adjustments that needed to be made as the copying in Maya wasn't exact (the front leg was going up and backward rather than forward). But once I corrected this issue, I took the front left leg and copied it onto the third left leg and the second right leg. I followed the same process with the opposite legs also. Next, I added in the motion of the body. In the tutorial, it was suggested to add an up and down motion, which added rhythm to the body. But from live-action references, the body very subtly moves to change direction quickly. I decided to follow the tutorial, as the principle behind it is the key to understanding this locomotion, but I did reduce the up and down motion to come across as natural. I then added in the opposing and secondary action such as the tail - body goes up, tail goes down - and applied an offset on the different tail or "spine" controls for flexibility.
I then incorporated gentle head movements from side to side and applied the same technique to the claws, but with an added offset. When I completed this animation, I considered how I could improve it. I thought about using the FK handles on the claws, to add some further flexibility into the joints. However as I already used the IK handles, I was trying to blend the two handles together, but it simply didn't work well enough. I did add some additional movement in the pincers and the lower claws.
Once the animation was refined and complete, I incorporated a background into the scene using a model from TurboSquid. I thought having an ancient like building would make this shot intresting and work well with this creature. I then added key frames on the Z translation of the main control, so the scorpion was moving across the scene. This was a challenge and did consume a lot of time as it was hard to avoid the feet slipping. Even though all the feet move at the same constant rate, and the main control also moved at a constant rate, the feet would slip. I kept making adjustments until I found a speed that closely matched with the feet. Doing this method of "walking on a spot" is easy and quick as it can be placed on cycle and can be played at any length of time and its finished. But when it's apart of a scene, it's difficult to make the rig walk seamlessly. Admittedly, I had more trouble making it seamless with this rig and cycle than my previous work.

The next stage was to bake out the simulation. I have been enjoying the benefits of using this method and makes animating easier and less complicated. I set the frame length to 165 and baked out the controls. I did edit the key-able frames to every four frames, as I found that worked better for me than every two frames, as I could clearly see the cycle and which frame did what. About 3/4 towards the end of the animation, I had the scorpion stop and snap its claws, before continuing to carry on walking.

I took advantage of the animation layers I had created during this process and the different layers I baked the controls on, rather than just one layer. I made adjustments with the weight of the layer. This meant that technically when the scorpion stops, the walk cycle frames are still there, but the value or weight is keyed at zero. This meant I could create a small animation within that gap, without affecting the rest of the cycle or making it overly complicated and getting confused with the keys and controls I've used. This also saved a lot of time as I could "resume" the walk cycle after this without having to redo or copy and paste anything. It was also helpful to have all these different layers and adjust the weight value as much or as little as I wanted, so the animation smoothly incorporated together. I had used the weight of animation layers briefly before this course, so it's still a new concept to me, but I really find it useful in making animations less time-consuming as and when needed.
Shown here is the completed walk cycle, effectively demonstrating the dynamics and intricate movements of a scorpion. Learning new characteristics of another arachnid creature has been incredibly beneficial, broadening my understanding of the subject.
The Final animation
This is the finished animation, and I'm pleased with the outcome of the narrative. I dedicated extra time to the camera work and lighting, which might not be as essential as the animation itself, but I wanted to ensure it felt engaging and refined. I also feel I have animated the walk cycle as best as I can in relation to the tutorials and live reference video. To develop this further, I'd like to improve the legs and their positioning. I feel that the legs are not the strong point in this animation when they should be, as they seem to still slightly "slide", so moving forward, I’d like to define the leg movement and positioning. However, the underlying movement theory is there. This exercise was enlightening and interesting, as I discovered a new method for organizing my work and created a unique walk cycle for a scorpion that has similar qualities to a spider walk cycle. It was important to identify the distinctions between the two species to ensure clarity and realism.
Reflections and Refinements
When looking back on this piece, I did try to make some more improvements with the feet, which I believe in the end did make a difference, and it is less noticeable. It is still an issue, however, and I'd like to, in the future, have another attempt at this animation. I am pleased with the overall setting and narrative of this animation, which I think makes this seem a stronger piece of animation. I can see this being used in a game as a feature or background element. The render per frame didn't take too long, but it was the whole duration of the sequence that did, even with low render settings. Since the beginning of this module up until now, I can see myself becoming more confident in using various methods and tools to create these animations, as well as becoming faster at the process.


Comments